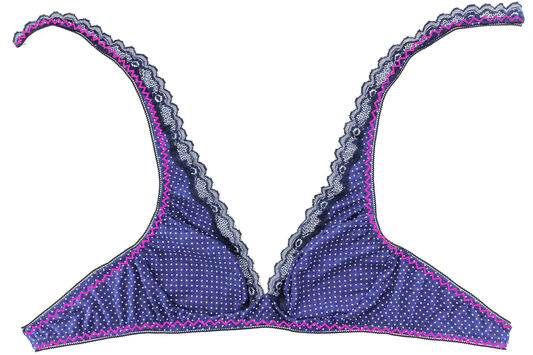
How to transform Smoothie pattern with jersey knit ?
You like the Smoothie lacy bra pattern, but… would you like to modify it to sew it in jersey / knit fabric ?
We do too !😀
In this tutorial, you will find a step by step guide to transform your sewing pattern yourself, and be able to decline it with your favorite fabrics!
Are you ready ? Let's go !
1. What you need
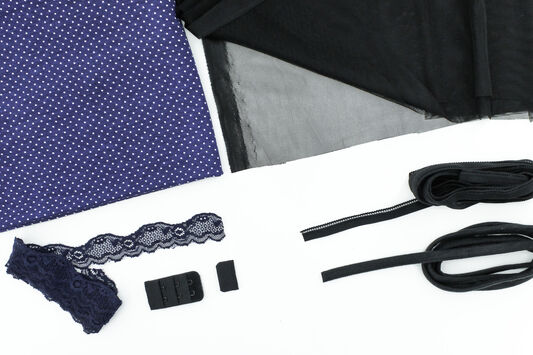 |
- The knit fabric of your choice, in this tutorial we used au Viscose-Elastane jersey - An elastic lace trim / galloon for the neckline. - Rigid mesh for the bottom cup lining. - Plush elastic as detailed on the tutorial - An hook & eye - Wire-case, or a smooth biais of 1 cm ( 3⁄8 in) wide for nice and clean finishing. |
2. Pattern alterations
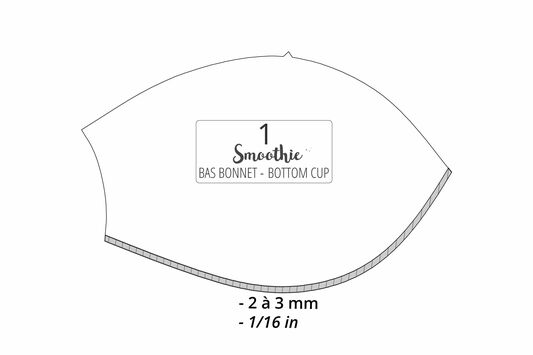 |
Bottom cup (piece #1) : As knits are more extensible than lace, remove around 3 mm ( 1⁄8 in) on the bottom of the pattern of the piece to compensate the difference in extensibility. NB: there is no pattern alteration on the bottom cup lining (piece #3) |
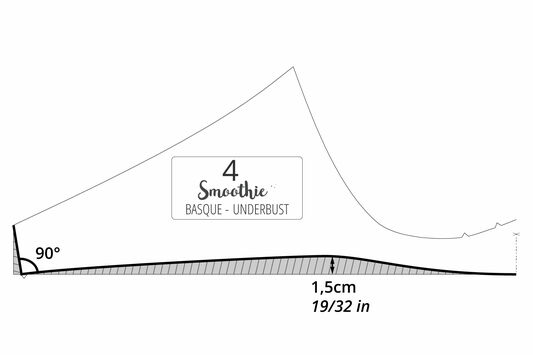 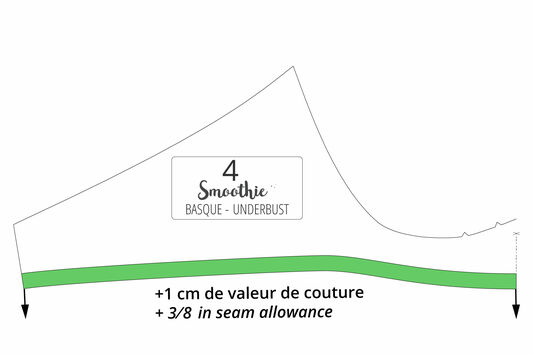 |
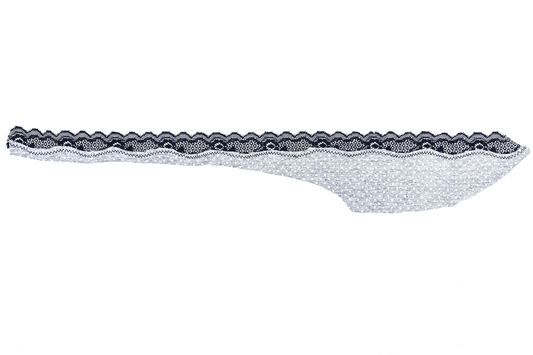
Underbust (pièce #4) : To transform this Underbust into a knit version, start by rounding the bottom line inward by 1.5 cm ( 9⁄16 in). Draw a right angle between the bottom line of the underbust and the hook & eye line. Then add 1 cm ( 3⁄8 in) of seam allowance in parallel with this new line, which corresponds to the width of the elastic that you will sew later. Check that the height of the hook & eye line corresponds to the width of your hook & eye + the 2 cm ( 3⁄4 in) of seam allowance : 1 cm ( 3⁄8 in) at the top of the underbust and 1 cm ( 3⁄8 in) at the bottom). |
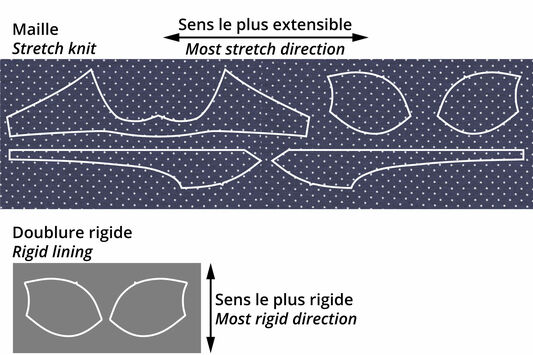 |
Pin the pattern on the fabrics, following the grainline indications on the pattern, then cut the pieces as detailed on tutorial : Stretch knit : Cut the underbust (piece #4) one time; and Bottom cup (piece #1) + Neckline (piece #2) two times. Rigid lining : Cut two times the Bottom cup lining (piece #3). |
3. Prepare the neckline
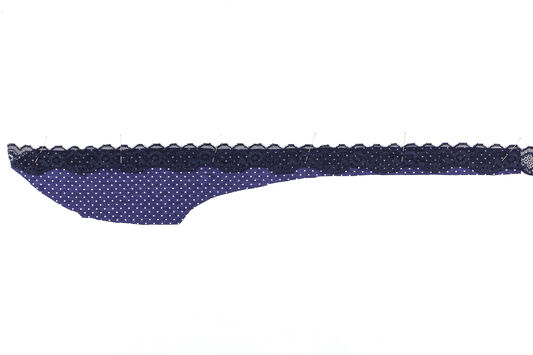 |
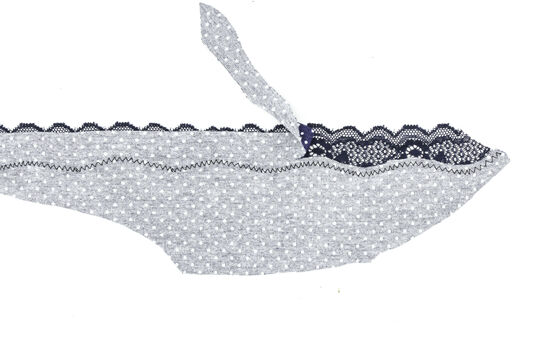
To hack the pattern, the neckline will be finished with an elastic lace braid. Position the hollow of the lace scallop at the straight line of the knit neckline, and pin it all along. Leave 1 to 2 cm ( 3⁄8 to 3⁄4 in) excess length of lace on each side of the fabric. 👙Sewing tip👙 To know more about lace definitions, you can read more on this article : how to cut a lace |
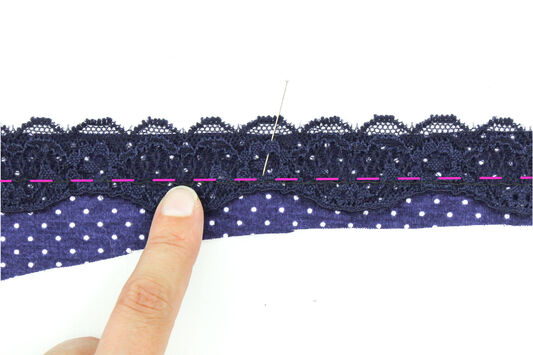 |
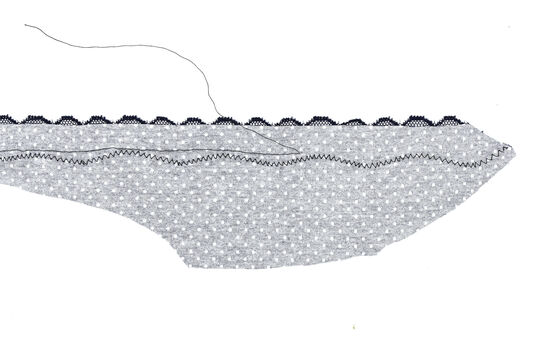
Make a basting seam with a long straight stitch on the lower part of the lace, to hold both fabric together. |
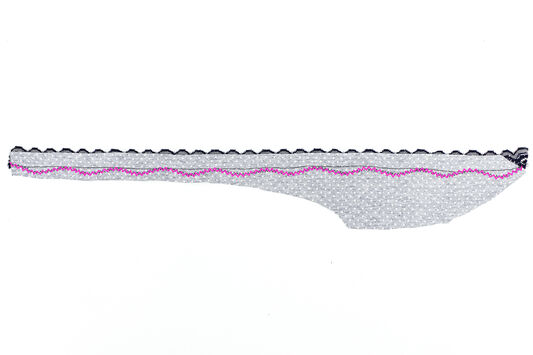 |
Then make a seam with a stretch stitch all along the bottom of the lace. For this tutorial, we made a zigzag stitch by following the scallop curve of the lace braid. If this is too complicated, you can make this stretch seam in a straight line. |
 |
You can now cut the excess length of lace that you left on each side of the neckline. |
 |
Remove the basting stitch. |
 |
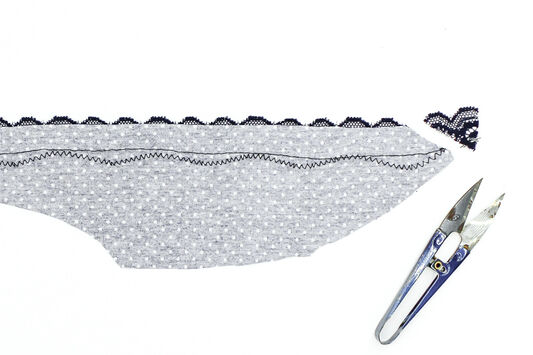
Then cut the excess of fabric under the lace, about 5 mm from the zigzag seam. |
 |
And now your first neckline is ready! All you have to do is repeat the same steps on both cups before going on to the next steps😉 |
4. Let's sew !
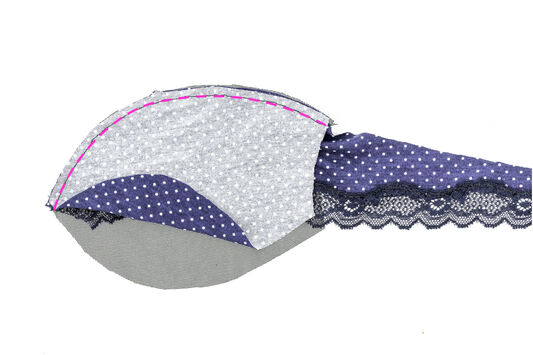 |
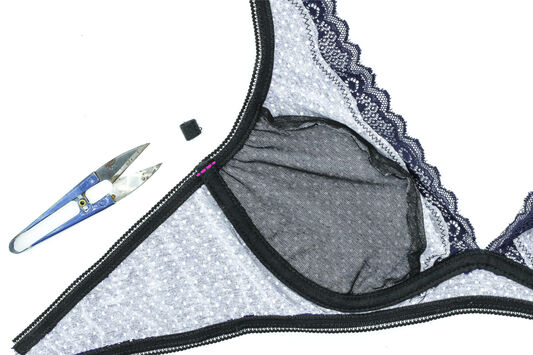
According to the cup assembling notche, overlay the right side of bottom cup on the right of the neckline piece. Superimpose the bottom cup lining over the neckline, to take it onto a seath seam (like a «sandwich») between the two layers of bottom cups fabrics. Make a 5mm seam |
 |
The bottom cup lining is larger than the fabric. It’s totally normal, the lining excess makes it possible to anticipate the difference of extensibility between the two fabrics 😉 |
 |
Make a basting stitch on the edge of bottom cups, to maintain the two layers of fabrics together. (Repeat the same steps on both cups) |
 |
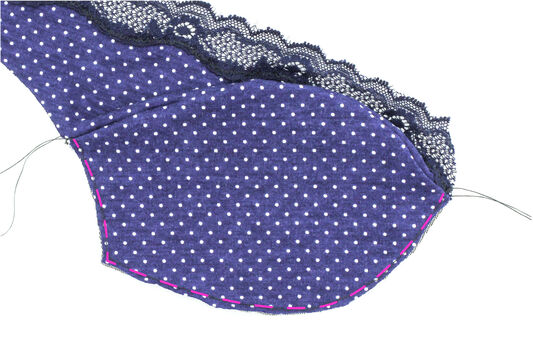
According to the notches and mark on the underbust pattern, pin right sides together the neckline scalloped edge of the first neckline, in the alignment of the notche. |
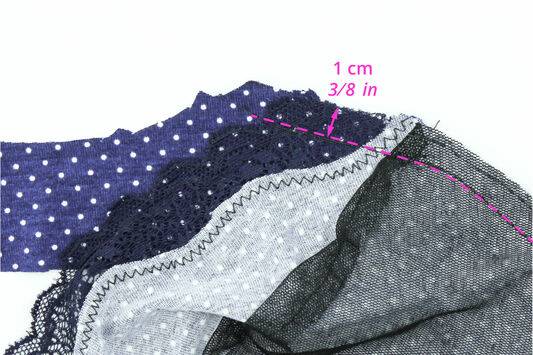 |
Assemble the first cup with the bust with a 1 cm ( 3⁄8 in) seam. |
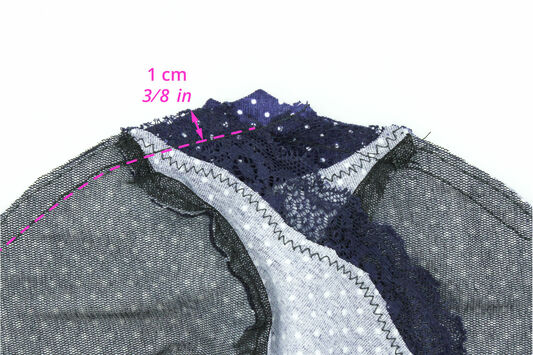 |
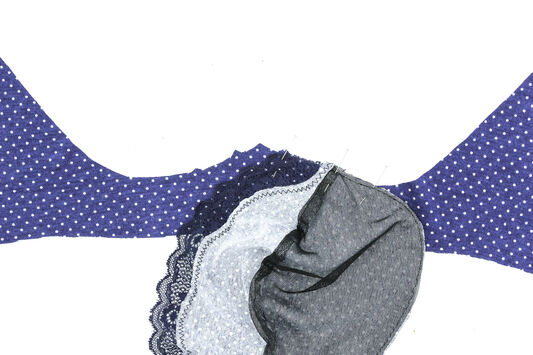
Pin the second neckline on the underbust, still according to the mark, in the alignment of the opposite side notche. Assemble the second cup to the underbust with a 1 cm ( 3⁄8 in) seam. |
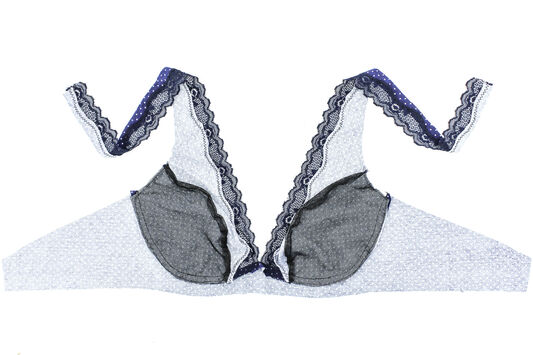 |
Here is the result ! 👍 Orient the seam between the cup and underbust downward. |
 |
Cut the underbust and underam elastic lengths as detailled on the chart of the Smoothie tutorial, page 8. Split regularly the underbust elastic gathers on the right side of the underbust and underarm. Attach the elastics with a ZZ stitch on the right side of the bra. For more informations about sewing elastics, don't hesitate to read our article : 3 ways to sew an elastic |
 |
Then, flip the elastics with a ZZ stitch to the wrong side of the bra. |
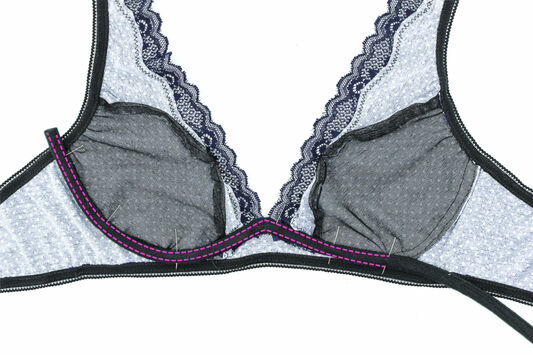 |
Orient the cup assembling seam downward and pin the wire-case over the seam, leaving 1 cm ( 3⁄8 in) exceed each side. Make two straight stitch seams on each edge of the wire-casing. |
 |
Then make a bartack stitch on the edge of the wire-casing, and cut the excess on each side. |
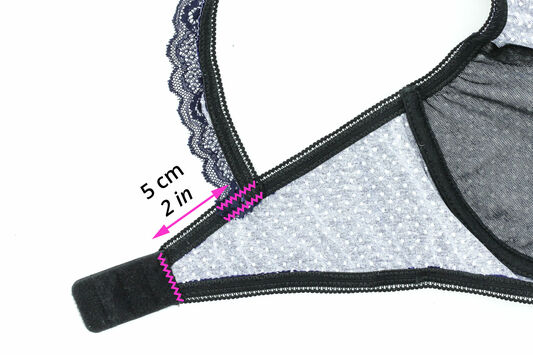 |
Attach both parts of the Hook & eye fastener : the «eyes» part is attached on the left side the «hooks» part is attached on the right side. (You will find all sewing steps on this article : How to sew a Hook & eye) Then, attach the strap on the wing , at 5 cm (2 in) from the hook & eye. Make 2 bartacks on the upper wing elastic to maintain the strap. |
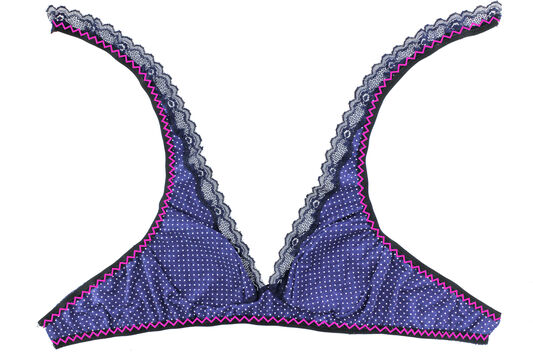
Well done, you've just hacked your Smoothie pattern 👌

We hope that you liked this tutorial 👙
Do not hesitate to read all our Sewing tips to learn new lingerie technics.


