How to print and cut your PDF pattern ?
You are ready to print your first Fitiyoo sewing pattern?
We are so glad! Here we are going to explain, step by step, how to do to put together your sewing pattern
Are you ready ? Let's go !
- Print the sewing pattern in real size
- Join the sewing pattern together
- Cut the sewing patterns to your size
- Preparing the fabrics
- Let's cut the fabric !
1. Print the sewing pattern in real size
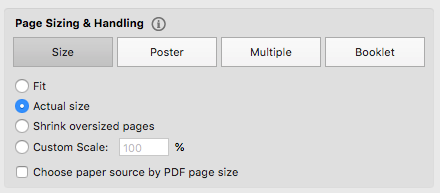 |
Open the PDF file in Acrobat Reader and print it. In the window that opens, check the box “Actual size” to respect the scale of sewing pattern. |
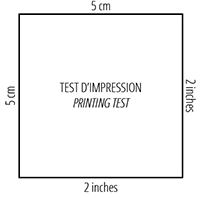 |
Print the page 1 (cover sheet), comprising a 2x2 inches TEST square. Check that the print is in real size by measuring this square, and, if everything is OK, then you can print all the sewing pattern. |
2. Join the sewing pattern together
After printing, your mission will be to put all sheets together!
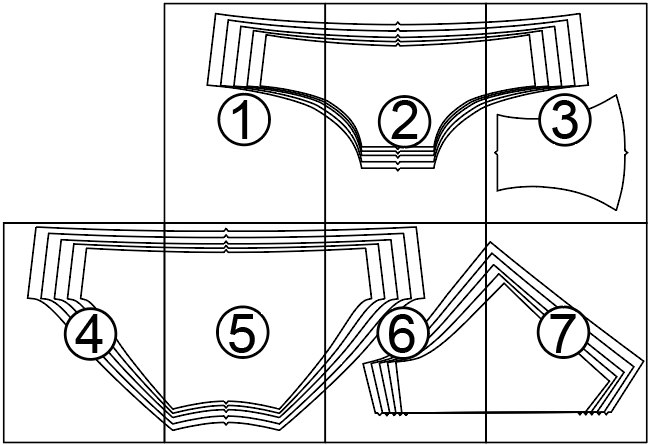 |
To do this, it’s very simple: look at the sketch with all the connections as detailed on the tutorial. |
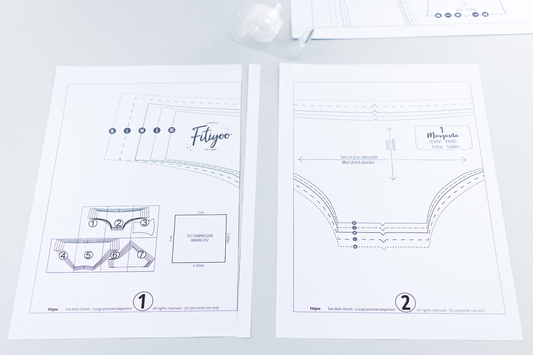 |
Cut the empty contour on the right side of page ⓵ according the line. No need to cut more lines. This part will be removed to be glued on the left side of page ⓶. |
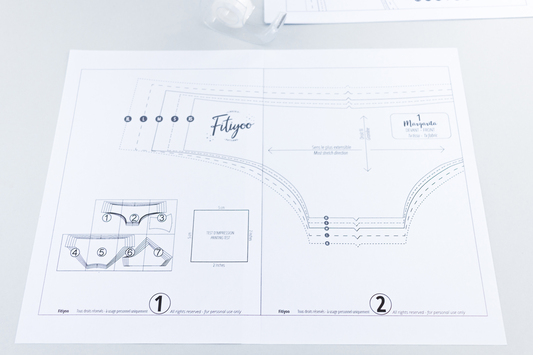 |
Superimpose the edge of page ⓵ on the empty tongue of page ⓶, by connecting the dotted lines of sewing pattern face to face. You can apply glue on the tongue of page ⓶ and glue page ⓵ on it, or you can also tape all along the pages. |
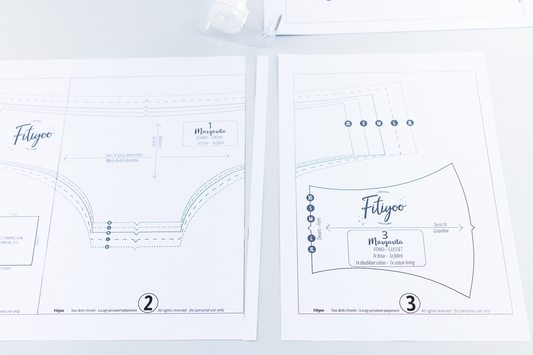 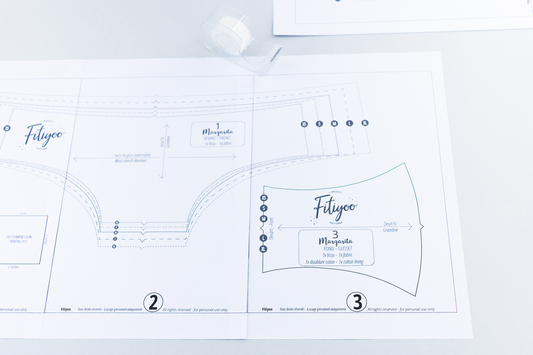 |
Continue the same way to bring together all pages and obtain the complete sewing pattern. Your mission is done, Well played !😉 |
3. Cut the sewing pattern to your size
Now that you have all your patterns, you have to identify your size to have a perfectly fitted model! To do it, we wrote an article for the measuring process for bras and for panties.
 |
Size are differentiated by dotted/broken lines and size disk, once you have spotted your size, you just have to cut on the corresponding line. |
Sewing allowances are included into our patterns.
They are about 5mm and 1cm. We give you the detail of seam allowances into each tutorial. You can change them before cutting the pattern.
Bra patterns :
On our bra patterns, we did not draw the upper wings line.
This is not an oblivion, nor an excess of laziness 😊 but so that each one of us can do it according to our body by connecting our cup size with the wings size corresponding to our own measures!
To better understand how it works, here are some examples :
1st Example :
Underbust circumference : 70 cm (27 1/2 in) → Your band size is S
Breast circumference : 100 cm (39 3/8 in) → Your cup size is L
Link the side seam size L to the middle wing size S

2nd Example :
Underbust circumference : 77 cm (30 5/16 in) → Your band size is M
Breast circumference : 95 cm (37 13/32 in) → Your cup size is M
Link the side seam size M to the middle wing size M

3rd Example :
Underbust circumference : 84 cm (33 3/4 in) → Your band size is XL
Breast circumference : 85 cm (33 1/2 in) → Your cup size is S
Link the side seam size S to the middle wing size XL

4. Preparing the fabrics
Wash all your fabrics before cutting them, and do it for all your sewing project 😉
Why is it so important? Fabrics and lace are never 100% “stable”, they can shrink after the first washing depending on their composition.
Fabrics already have many lifes before their arriving into our wardrobes: weaving or knitting, dyeing, use of primer… During all those process, there are lot of strains that can stretch fabrics more or less.
First washing gives them their original aspect. Without it, you may see your garment or your sweet pantie shrink after your first washing. And, apart from that, this will remove all residues (dyeing, …) and that is the insurance to have a smooth and impurities free fabric on your skin.
When you turn on your washing machine for clothes, you can add your fabric (the easiest and common for fabrics is a 30° cycle) or, an other option, is to leave the fabric to soak into a bowl and let it drain. If the composition allows you to do it, you can iron your fabric before cutting it, that way, it will be fixed!
5. Let's cut the fabric !
Now you’re ready to cut your fabric! Spread it flat on a table, without any folds. As pieces are small and fabric are thin, you can place a thin paper under your fabric (like silk paper) that will be pin at the same time than the fabric. This will helps a lot to maintain the fabric during the cutting.
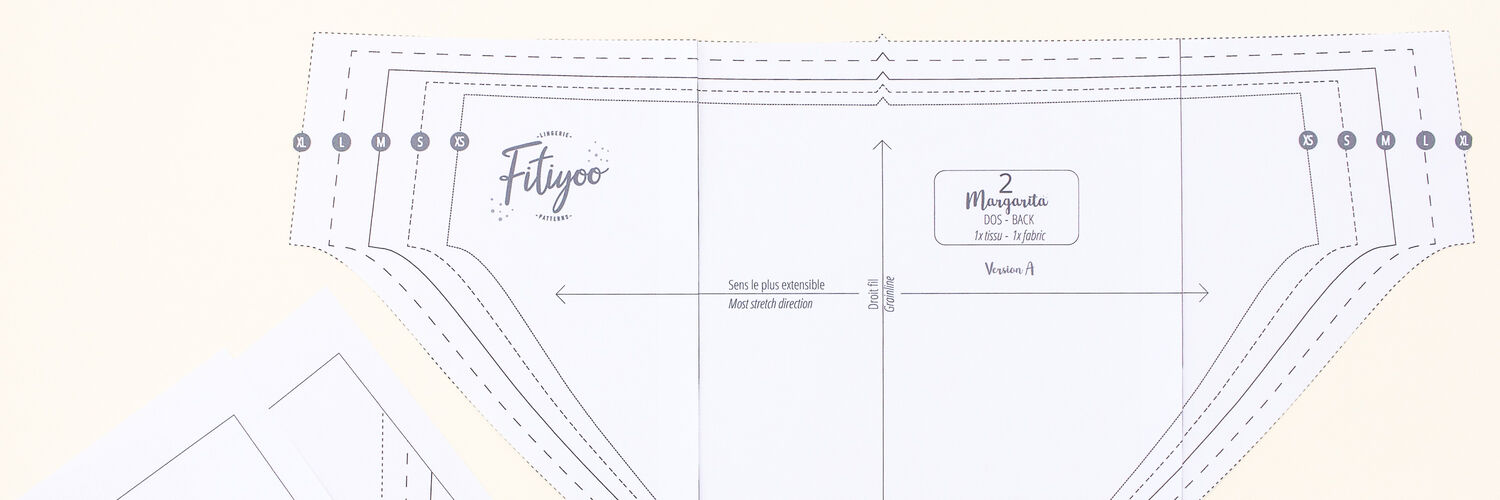
For a model with stretch fabric, check the most stretch direction of your fabric (vertical or horizontal). Depending on that, place your sewing pattern by following the arrow “most stretch direction”
For a model without stretch, place the “Grain line / Wrap” of your fabric vertical (parallel to the selvedge). Depending on this direction, place your sewing pattern by following the arrow “Grain line”
For a model with lace, we give you the detailed process to follow in this article: How to place your sewing pattern to cut lace Place several pins / needles around each piece of pattern, or put some weights on pattern ends so the paper won’t move during cutting. Take your scissors (or rotary cutter) and cut all around your sewing pattern.
Two useful points when you cut the fabric:
Don’t forget to cut the “V” notches that we place on sewing pattern. They are not always easy to cut, but are very important thereafter. And, keep fabric scraps.
Why “V” notches?
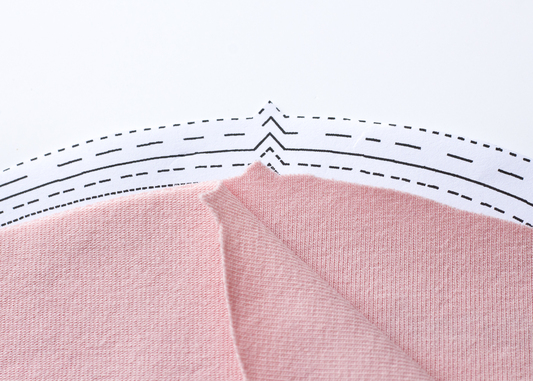
In lingerie, most of seam allowance are about 5mm to keep seams thin (more comfortable on skin), and we use very light and sometimes perforated fabrics (like lace).
“V” notches (outside notches) are easy to spot on sewing pattern, on jersey or even a lace.
With “classic” notches (by nicking the fabric), it could exceed the 5mm of seam allowance and make a fault, or even a hole that will weaken the garment thereafter.
Those “V” notches can be puzzling at first sight and you have to practice to have the knack… But, wait, it’s only a matter of time 🙂
Why keeping fabrics scraps ?
They are so useful to set up your sewing machine before starting your model !
With scraps, you can test thread tension, insert a band on a fabric and see if you are confident to do it on your lingerie…With those tests and sep up on fabrics scraps, no more fuss during sewing!
We hope that the informations helped you. Do you have other tips to prepare or cut your fabrics?
To know more about which material you should use, to know more bra or panties measurements, you'll find all the informations here.
If you have doubts, do not hesitate to contact us :


