How to place your sewing pattern to cut lace
Before starting sewing your lovely lacy lingerie piece, we recommend to read this article.
Oh yes, you will have to cut your lace before starting. It's not 'rocket sience', you'll see. Simply, there is a few things to know so that everything goes well thereafter 😉.
Are you ready ? Let's go !
- Basic notions
- Cut along the valley of the scallop
- Cut according to a starting point and an arrival point
- What to do when your lace is not wide enough ?
1. Basic notions
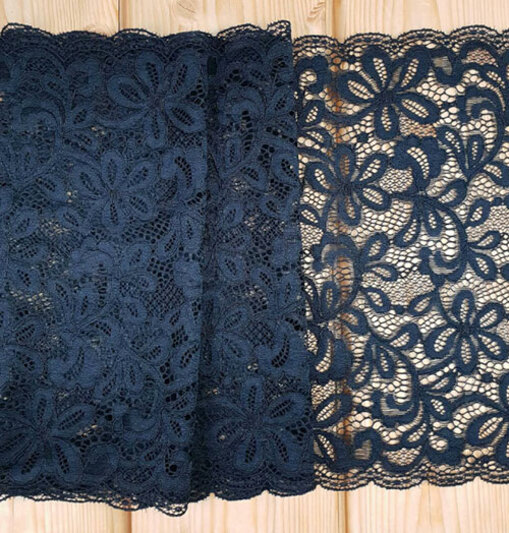 |
The lace we use to sew lingerie, are generally stretch bands or galloons Bands and galloons, are lace trims with single or double scalloped edges (e.g picture on the side). There is also wide width laces, without any scalloped edge. |
The scalloped edge of a lace represents the decorative festooned part on the sides, with most of of the time a waved shape.
In fashion industry, we call the scalloped edge, the "lace teeth", and it's composed in 3 parts :
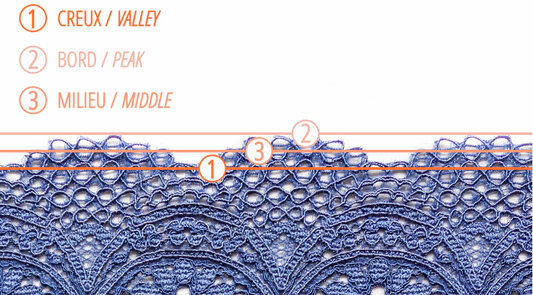 |
1. The valley of the scallop. Correspond to an imaginary line, that we will draw on the bottom of the scallop, in the lower part. 2. The peak of the scallop. Correspond to an imaginary line, that we will draw on the edge of the scallop, in the upper part. 3. The middle of the scallop, correspond, logically, to the line between the peak and the valley of the scallop. |
⭐ Quick tip ⭐
Important detail : The greater the difference is between the peak and the valley of the scallop, the more difficult it will be for you to cut correctly your lace, but especially to sew it together.
That's why we recommend a MAXIMUM distance of 1.5 cm between the peak and the valley lines of the scallop.
Now that you know more about the lace vocabulary, it's time to practice !
On our sewing patterns, each piece that needs to be cut in lace have annotations on it.
It's actualy these annotations that we are going to explain in the following part.
2. Cut along the valley of the scallop
It's possible to cut the lace all along the valley of the scallop, in condition that this piece doesn't need to be sewn with an other piece of the pattern; and so, doesn't need to have the same seam length.
For example, it's the case when we apply lace on top of an other piece (for a customization, or a yoke).
It's the easiest cutting technique to use, but, depending on the project, it's not always the most appropriate.
Here are some examples to illustrate 😉
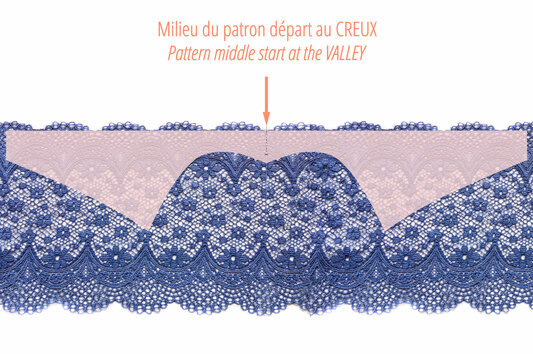
1st Example, The underbust band of the Smoothie bra :
The starting notch is placed on the middle of the pattern, to have a symmetrical repeat once the underbust band will be cutted.
Note that you will have to fold the lace on the ends to sew the hook & eye closure, or to let out the excess of the lace.
2nd Example, The neckline of the Smoothie bra :
In this case, the starting notche on the pattern correspond to the seam with the underbust band (the piece you have seen on the 1st Exemple). As the lacy strap doesn't need to be sewn with an other pattern piece; we have followed the valley of the scallop line.
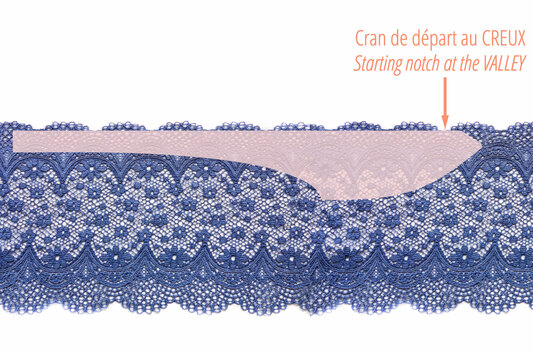
3. Cut according to a starting point and an arrival point
Most often, our sewing pattern will give you a starting notch/point (valley, peak or middle of scallop) and an arrival notch/point.
This method is very common in lingerie, because it allows to bridge the gap of length between two pieces that you want to sew, because of the fact that there is a difference of length between the valley of scallop line and the peak of scallop one. To place correctly your sewing pattern on lace, there are two steps to follow:
1/ Place the starting notch on your lace
2/ Pivot your sewing pattern in a way that your starting notch stay in the original position, while making the arrival notch at the edge of the lace.
Ok, ok, this sentence may be difficult to understand. No panic, here are some example 😊
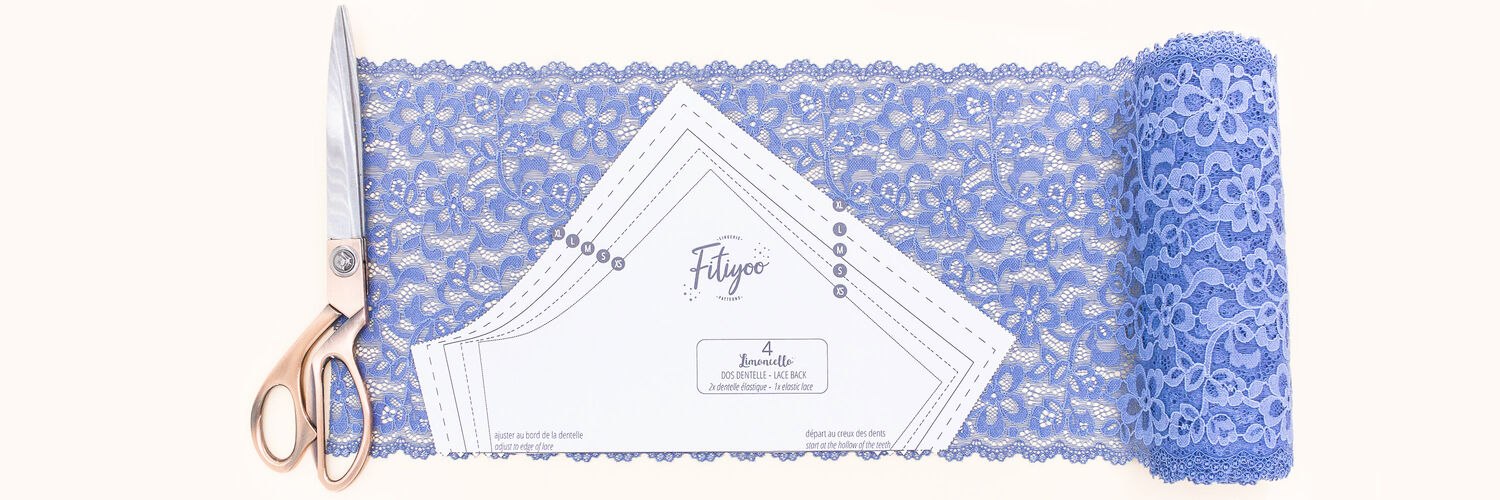
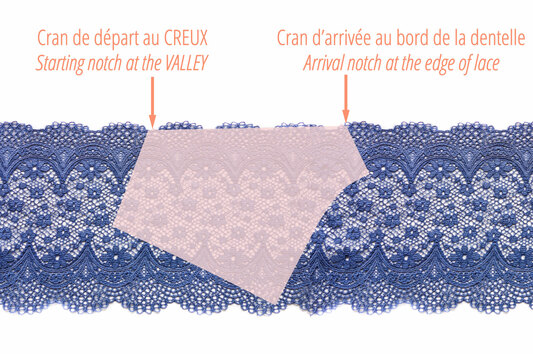
1st Example, The back in lace of the hipster Limoncello :
Starting notch is on the side seam, and the arrival notch on the middle back seam.
Once the starting notch at the valley of scallop is positioned, pivot the sewing pattern to have the arrival notch at the edge of lace.
In this example, the arrival notch arrives just after a valley of scallop.If the pattern have been shorter, it would have arrived at the valley of scallop, just before.
If the pattern had been longer, it would have arrived on the top of the edge, just after.
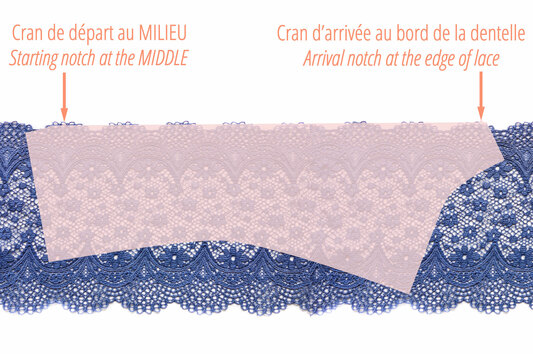
2nd Example, The lace boxer Papaya :
In this example, we want to place the starting notch at the middle of the peak, to avoid having something too much covering on front leg.
The arrival notch correspond to the middle back seam.
Once again, the arrival notch will be positioned just as it arrives on the lace. In this example, the arrival notch comes on the peak of the lace.
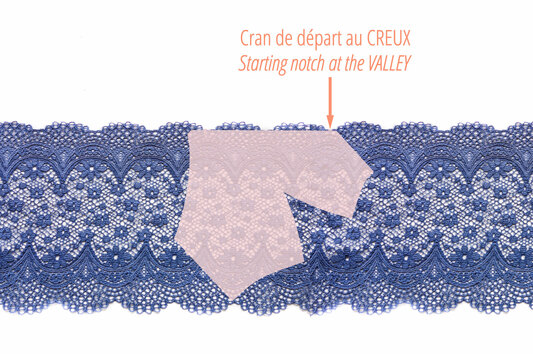
3rd Example, The neckline of Cherylada bra :
Starting notch is on the middle front seam, and the arrival of the neckline corresponds to the seam with the strap.
Once the starting notch is positioned at the valley of the lace, pivot the pattern until the arrival notch arrives on the edge of the lace, to respect the width of the strap.
4. How to cut sewing pattern when your lace is not wide enough ?
OMG! You've found THE lace that you love, but despite all your efforts… This magnificent lace isn’t wide enough to cut your sewing pattern 😭
How to do!? Cut a piece of the pattern? Stretch the lace?
Don’t even think about it!
You can make a seam for joining fabric edges and add enough fabric so that your sewing pattern fits naturally.
Keep hope alive, we explain you what to do here 😉. There are two possible options:
1srt option: Connect the lace with another piece of the same lace
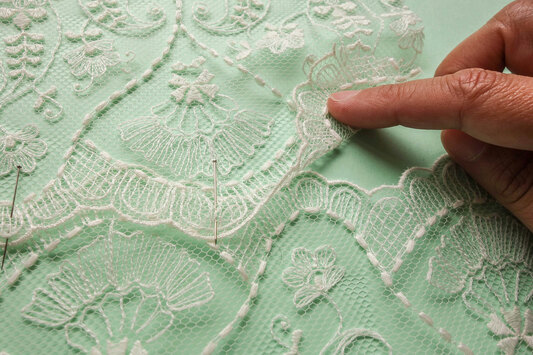 |
Prepare two piece of lace, place them on each other by according the scallops, and by superimposing them about 5mm (13/64 in). |
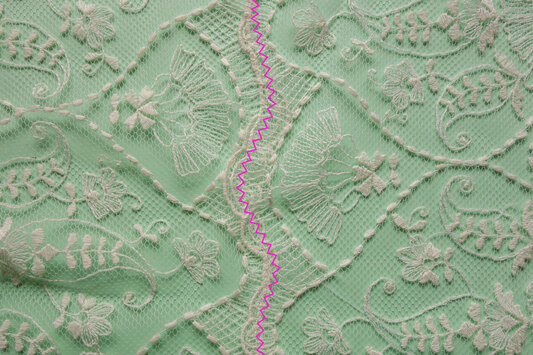 |
Make a zigzag stitch on the overlap part, to connect them together and keep the stretch of the lace. This is as simple! Now you can pin your sewing pattern all around 😊 |
Option 2 : Connect the lace with another fabric
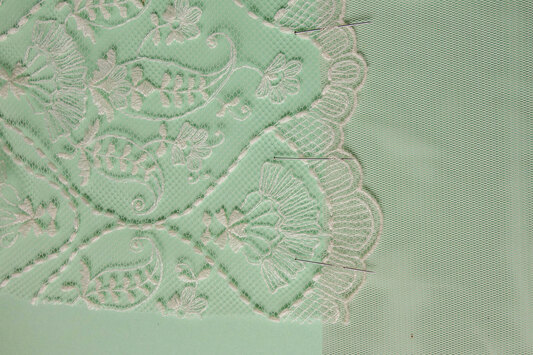 |
Cut a band of stretch fabric, of the missing height measurement + 2cm (3/4 in) of surplus (for security). Superimpose the lace on the fabric 5mm (13/64 in) under the valley of scallop. |
 |
Baste the two layer together with a large stitch to maintain them together. |
 |
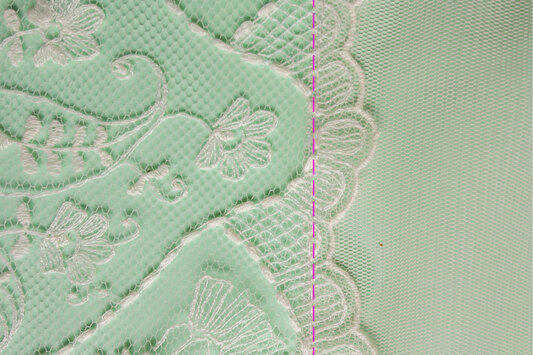
Then, make a zigzag stitch, by following the scallop edge to “inlay” the lace on the fabric. Remove the basting stitch and clear up (cut) the excess of fabric at the back .on the wrong side of lace. NB : If you found it to difficult, to follow the scallop edge, then you can make a zigzag stitch by following the straight line of the valley of scallop. Then you don’t need the last step. |
Now, cutting laces has no more secrets for you 😉.
You can find a lot of articles into Sewing tips category, such as How to sew a hook & eye? or even Sewing an adjustable bra strap.
Have fun sewing !
We hope that the informations helped you. If you have doubts, do not hesitate to contact us :


