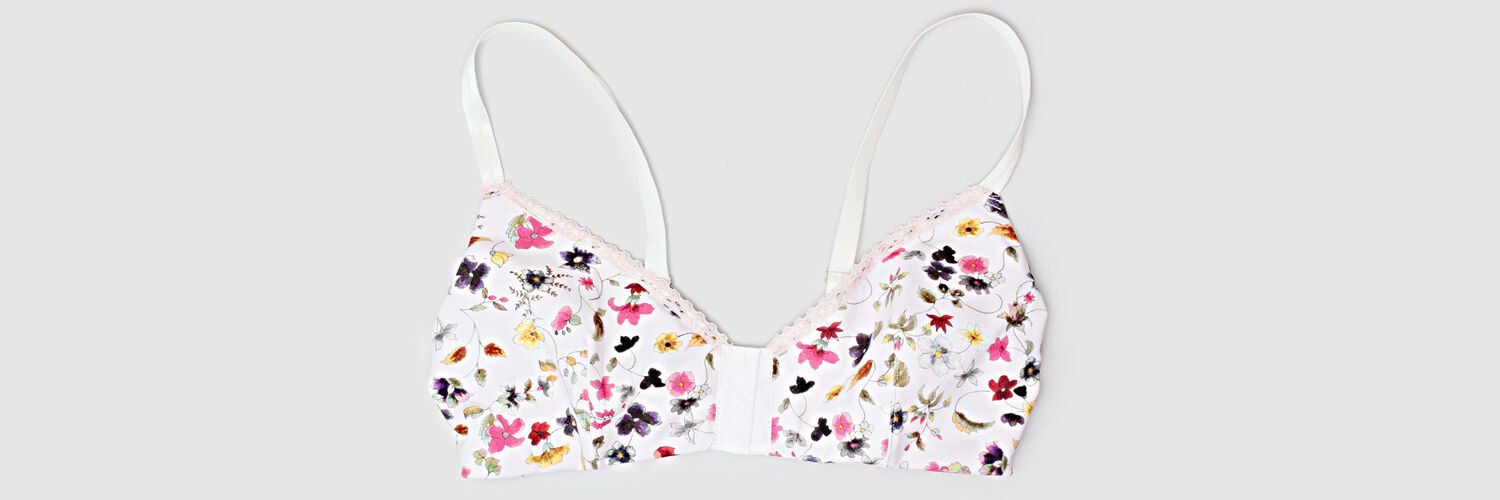
How to sew a post operative front-fastening bra ?
Because we have had the request several times, it seemed important to us to be able to answer to it. So, in this Breast Cancer Screening Awareness Month, here is a tutorial that will explain, step-by-step, how to sew a post-operative bra:
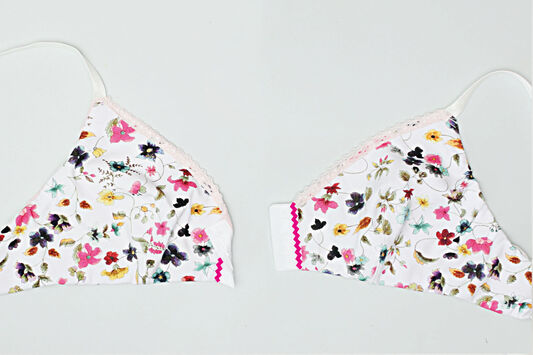
No more embarrassment with the back closure! Make way for a much more ergonomic front opening, especially when you can no longer turn your arms back.
And because it is important to take care of yourself in these moments, this tutorial has been designed with "sheath" seams, that means all the elastics are hidden between 2 layers of fabric, to offer you a maximum softness and comfort, and to avoid any skin irritation.
Of course, you can easily sew your bra “as usual”, if that feels easier and comfortable enough.
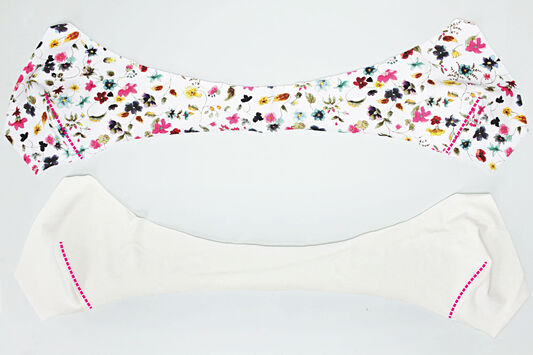
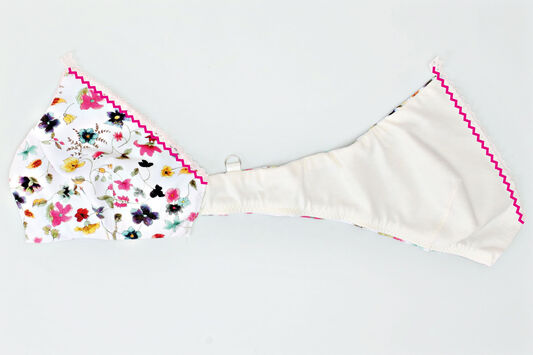
For this tutorial, we are "hacking" Cherylada bra (Version B, all jersey), this is the most adapted pattern to do the alteration.
NB: The needs may be different depending on the operation performed. Indeed, for a lumpectomy, we recommend, in addition to this tutorial, our article Adjusting your bra pattern with two different cup sizes; for a mastectomy, on the other hand, you will be more interested in Add a prosthesis pocket.
Are you ready to sew a bra that respects your body? Let's go !
- What you need to sew your post-operative bra
- Modify the bra sewing pattern to add a front opening
- Sew a bra with a front opening
1. What you need to sew your post-operative bra
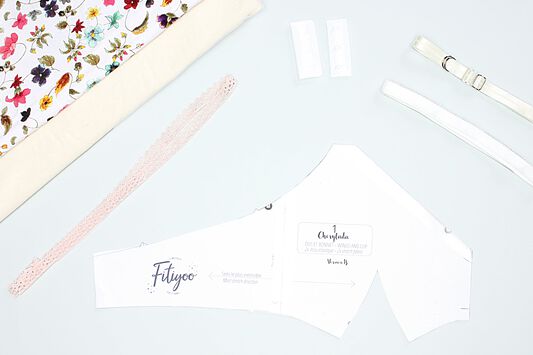 |
• A jersey knit for the outside of your bra. • A soft jersey knit for the inside of your bra (entirely lined). • A small stretch lace brade for the neckline finishing • Lingerie elastics between 1 and 1.3 cm for underbust and underarm • A pair of adjustable straps. • A one-row hook & eye. |
2. Modify the bra sewing pattern to add a front opening
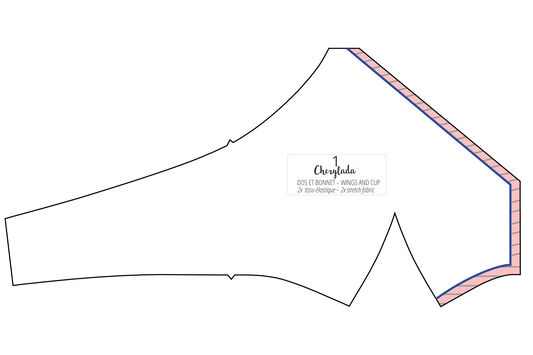
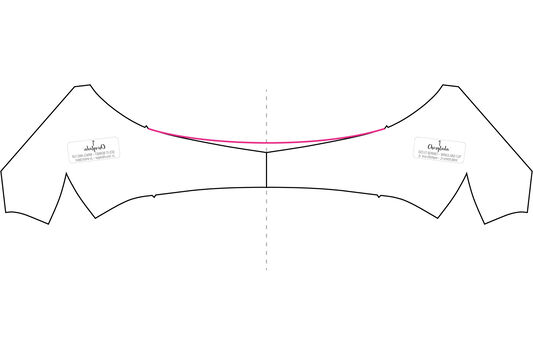
To sew a comfortable post-operative bra, we will use only the piece 1 (back and cup) of Cherylada pattern
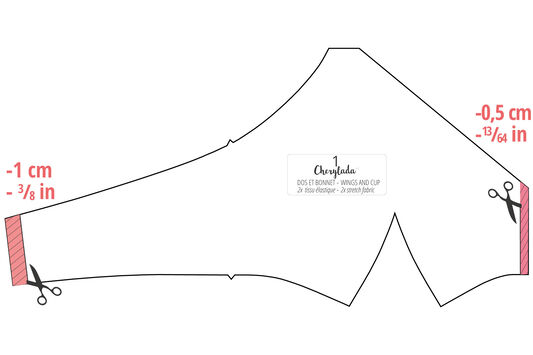 |
We will start by removing the seam allowances: - 1cm on the center back - 0.5 cm on the center front |
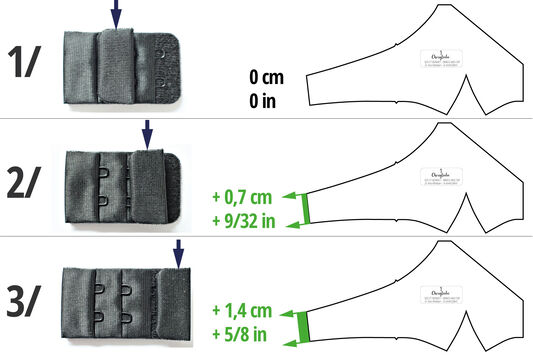 |
Depending on our habits (and needs), we do not attach all of our looks & eyes to the same level. So, to compensate for this “lack of adjustment” that could happen, we will detail the possibilities of adjustments that you may need: 1 / If you are used to fastening your bra as tight as possible (first row of hook-and-eye doors): You can go to the next step. 2 / If you are used to fastening your bra in the middle (middle door row / second row of staples): Add 0.7 cm back length. 3 / If you are used to fastening your bra at the widest point (third / last row of stapling doors): Add 1.4 cm back length |
 |
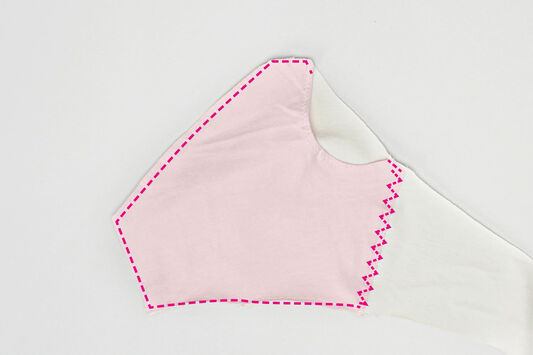
The middle back is ready. We are now going to go back to the middle front. At 1 cm from the edge, take off the following seam values on the inside of your pattern: - neckline - mid front - underbust. |
 |
From these lines, adjust the height of the mid front line on your pattern with no seam allowance, to match the stapling height. Trace the neckline according to this new height. NB: If you are using a lace braid or a foldover elastic with no need to fold the fabric (as we are doing in this tutorial) : do not add seam allowance at the neckline. If you are using an elastic which need to fold the fabric under it : add 1cm seam allowance at the neckline. |
 |
Once the center front line has been traced, add the corresponding seam allowances of 1 cm. |
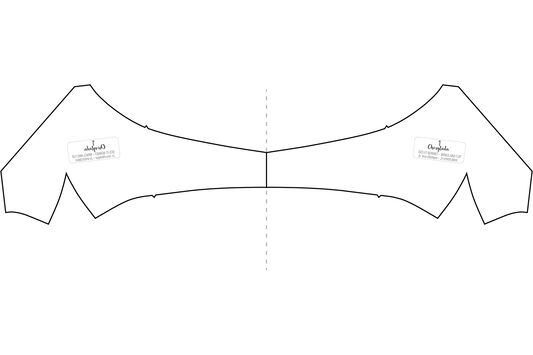 |
If you use the same cup size for both breasts, make your sewing pattern symmetrical by taking the center back as the axis .. If the two cup sizes are different, reproduce the modifications on both cups (as explained on this article) before joining the backs together. |
 |
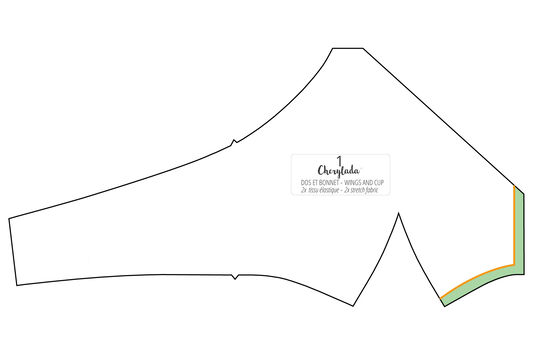
If necessary, traces the curves of the upper and lower back, to have harmonious lines. |
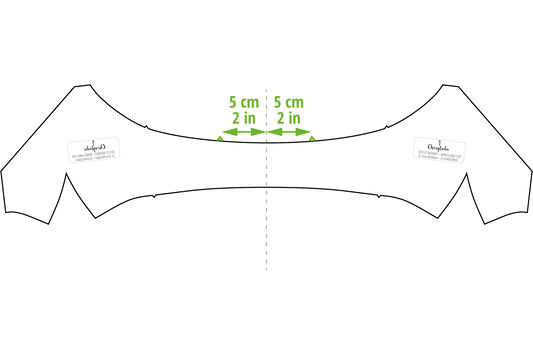 |
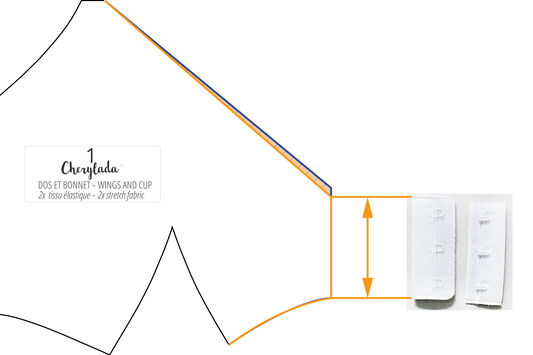
On the armhole line (upper back) place a mark 5cm on each side of mid back. They will be used for the installation of the suspender. You now have a pattern in one piece. |
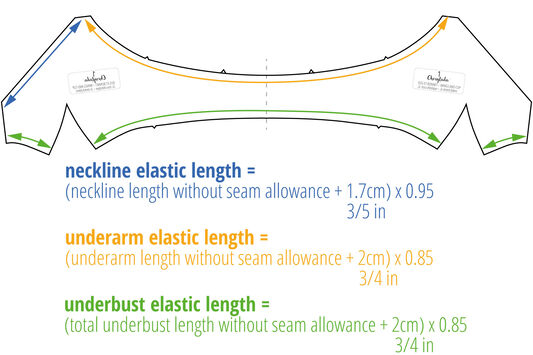 |
It remains to calculate the elastic lengths: Neckline elastic = (neckline length without seam allowance + 1.7cm) x 0.95 Elastic armhole = (total armhole length without seam allowance + 2cm) x 0.85 Underbust elastic = (total underbust length without seam allowance + 2cm) x 0.85 |
Your bra pattern is ready, it's time to sew!
3. Sew a bra with a front opening
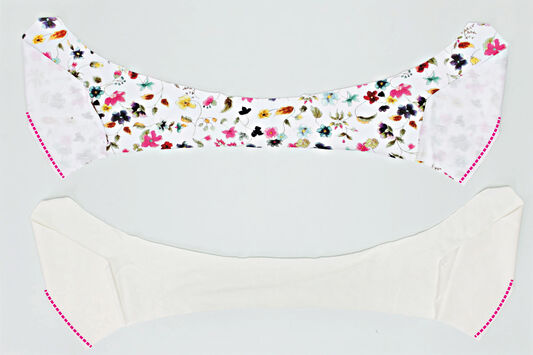
Now that your sewing pattern is ready, you can sew your bra!
 |
Lay the outside and the lining of the bra flat on the table. Fold them right sides together, overlapping the edges of the dart. Mark a mark 2 cm above of the seam allowance, to determine the arrival of the dart. Assemble the dart 5mm from the edge by rounding the seam to the mark previously marked. Let the thread hang over and tie a knot. |
 |
Unfold the cups. Orient the seam allowances to the sides, then topstitch the darts on the right side of the fabric. Let the thread hang over, tuck it inside the hat and tie a knot. |
 |
If you want to add a prosthesis pocket, now is the time to sew it on the right side of your lining with a basting seam. To prepare the pocket pattern, go to the dedicated article here. |
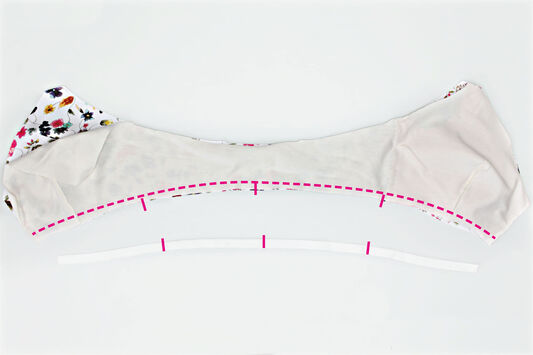 |
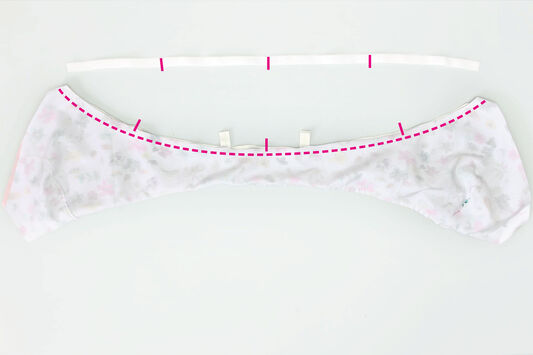
Referring to the chest darts, place the outside and the lining of your bra right right sides facing together. Sew a basting seam 1cm from the edge. Cut the length of the underbust elastic. Distribute the gathers of your elastic evenly. |
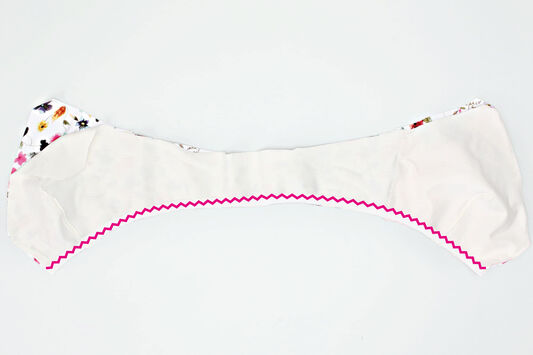 |
Position the underbust elastic on the lining. Sew a seam on the inside edge of the elastic with a stretch seam such as a Zigzag or 3-point Zigzag stitch. |
 |
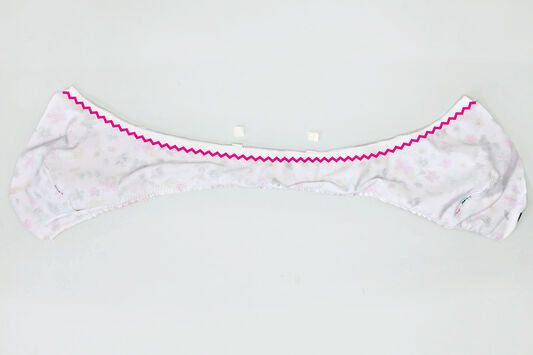
Open your bra, and direct the elastic towards your lining before making a second seam at the ZZ stitch. This will serve to keep the elastic in the right position (upwards), when you will wear your bra. |
 |
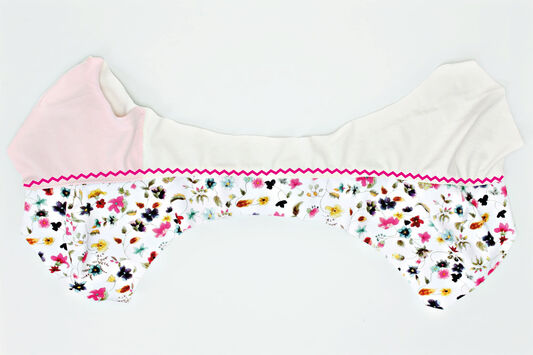
Use the mark that you drew 5cm from the middle of the back, to fix a “back strap tab”: This is a piece of strap of about 6cm, folded in 2, that you just slide in a ring. Orient this "tab" so that the ring is facing the bottom of the bra, at least 1.5 cm from the edge of the fabric (to be able to sew the elastic above). |
 |
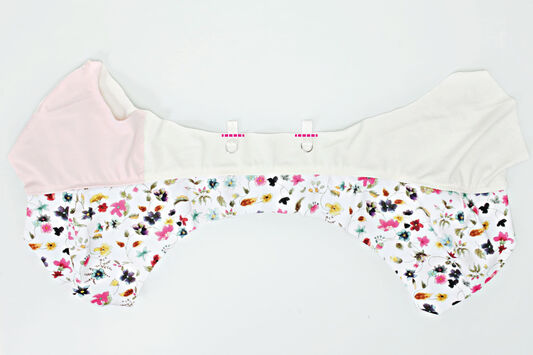
Replace the two parts of your bra, right sides together. Sew a 1cm basting seam along the entire length of the armhole. Then cut the length of elastic armholes. Distribute the gathers of your elastics evenly. |
 |
Position them on the seam allowances, in the outer fabric side this time. Sew a seam on the inner edge of the elastic with a stretch seam such as a Zigzag or 3-step Zigzag stitch. |
 |
Turn your bra upside down by the space left free in the middle of the front. Remember to "crack" the elasticated seams, to remove the basting stitch and recover all the extensibility of the elastic. You can now sew the stretch lace braid of the neckline with a ZZ or ZZ 3 stitches. |
 |
Prepare your pair of straps as detailed in our dedicated "Sewing tip". Pass your straps through the rings of the “ back strap tab ”. |
 |
Place the right side of the strap on the right side of the cup, sew a straight stitch seam 1 cm from the edge. |
 |
Bring the 1 cm of seam inside the cup, then make 2 bartack stitches to hold the strap: The 1st to 5mm from the strap The 2nd 5mm lower. |
 |
Now all you have to do is sew the two parts of the hook-and-eye. To know how to sew it, please see our dedicated "Sewing tip" here". Depending on whether you are left or right handed, you can choose the side that suits you best so that you can close the "doors" and the "hooks" with ease! |
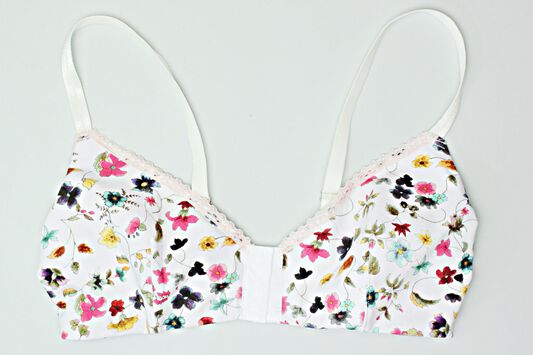
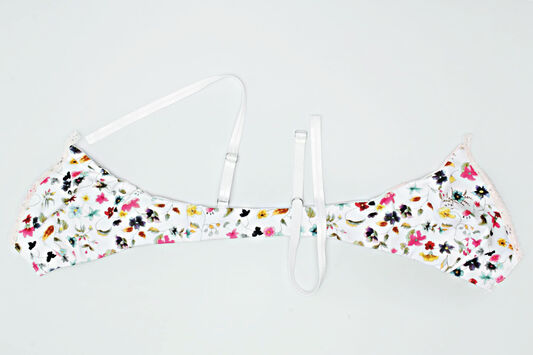
And There you go! You now have a bra that you can open from the front! Much more comfortable!
We hope you enjoyed this tutorial 👙 and that you will be able to adapt this model according to your needs!
If you have any doubts, do not hesitate to contact us: contact@fitiyoo.com


