How to sew a foam cup on a bra ?
You asked us several times: how to add a foam cup in a bra model !!
Here is a small tutorial that we worked on Cherylada bra, to show you the pattern making logic, so that you can adapt it to your needs on other models 🙂
Are you ready ? Let's go !
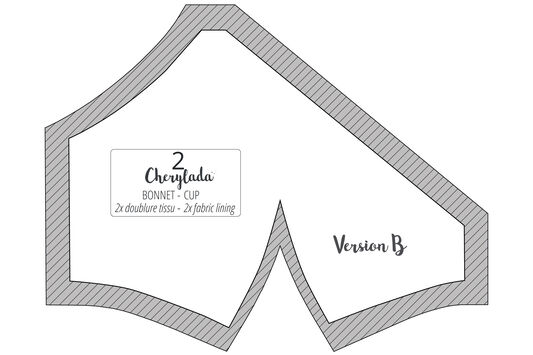 |
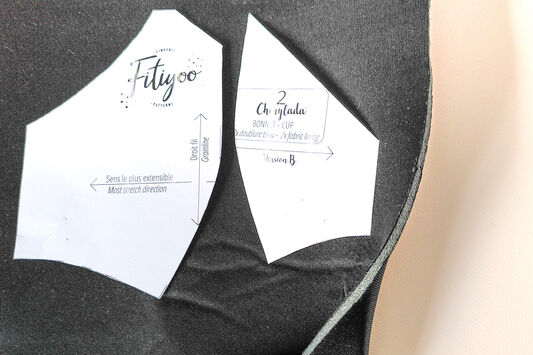
Use part n ° 2 (cup lining) to make the pattern of the foam. 1st step: remove the seam allowances |
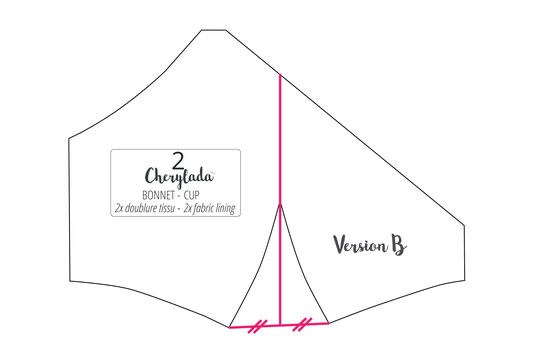 |
Next, transform the dart line into a “vertical yoke”. To do this, draw a line between the two lower ends of the dart. Divide this line into 2 identical sections. Then draw a straight line starting from this point, and passing at the level of the inner tip of the dart. |
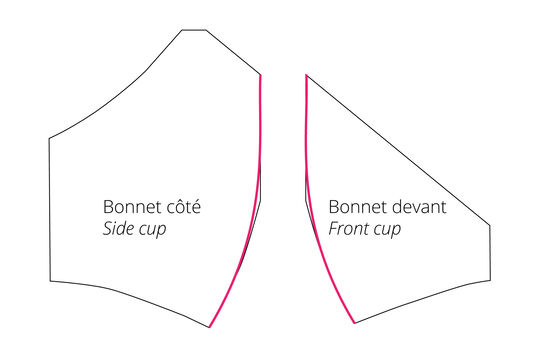 |
You will then obtain a cup in 2 parts: A front cup and a side cup. Slightly softens the vertical yoke line with a nice rounding, to avoid the pattern being pointed. |
 |
Place your two pieces on the foam. ** NB **: as you can see in the photo, the foam can break if it is bent, and these folds can create defects on the caps. So, a little advice: keep it flat between 2 sewing projects 😉 |
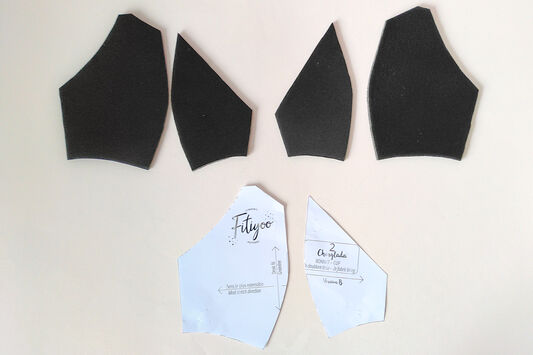 |
Cut the pieces symmetrically to get a right and left cup |
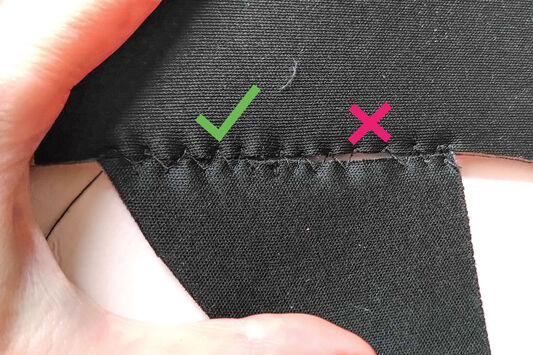 |
Before you start sewing the cups “for real”, we strongly recommend that you try sewing on scraps of foam: Set your machine to the “Zigzag 3 stitches”, with a width between 7 and 10mm. Position your 2 pieces of foam edge to edge, without superimposing them. Then, sew all the way with the Zigzag 3 stitches. The aim of these tests, is to obtain a regular stitch and that does not pull away when the foam is pulled. In the picture: - On the right, the stitch is not tight enough and the foam may open when worn with the weight of the breast - On the left, the stitch is tight enough and the width is sufficient so that the foam does not move when worn. |
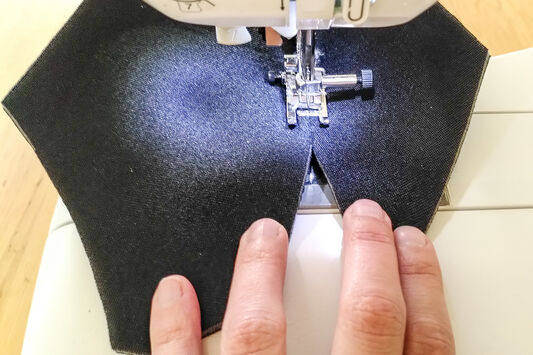 |
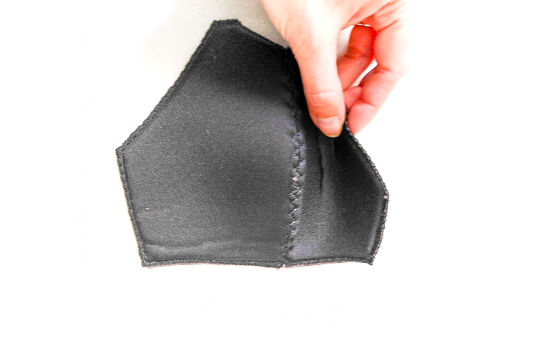
Once you have found the correct adjustment, all you have to do is sew the vertical yoke of the two cups, edge to edge. NB: To avoid stretch the foam, try not to “pull” on it, but rather to “push” it under the presser foot. |
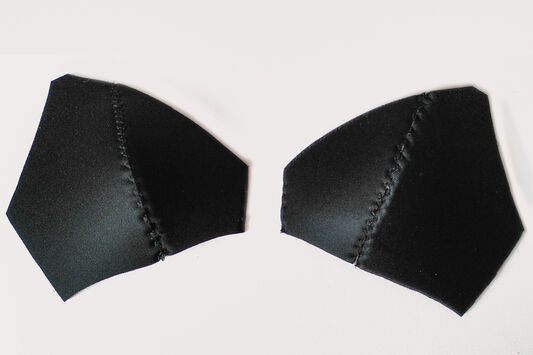 |
Tadamm !! your 2 cups are sewn, and the curve is very nice! |
Overlay the foam cup with a stretch fabric (such as jersey) :
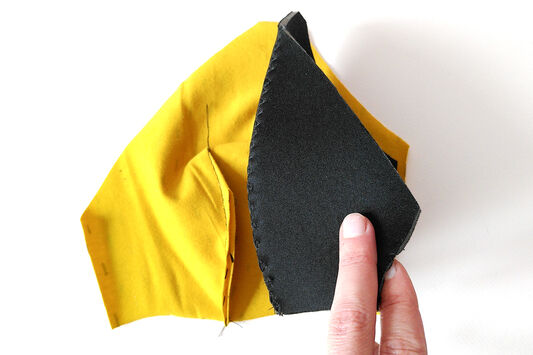 |
Prepare your cup that will cover the foam, as detailed in the original tutorial |
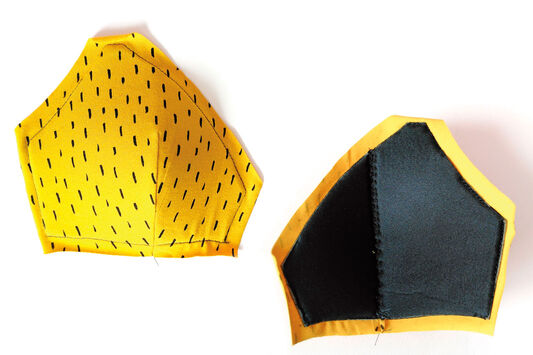 |
All you have to do is position your foam inside the fabric, respecting the original seam values, and sew a basting stitch all around the cup to continue your sewing 🙂 |
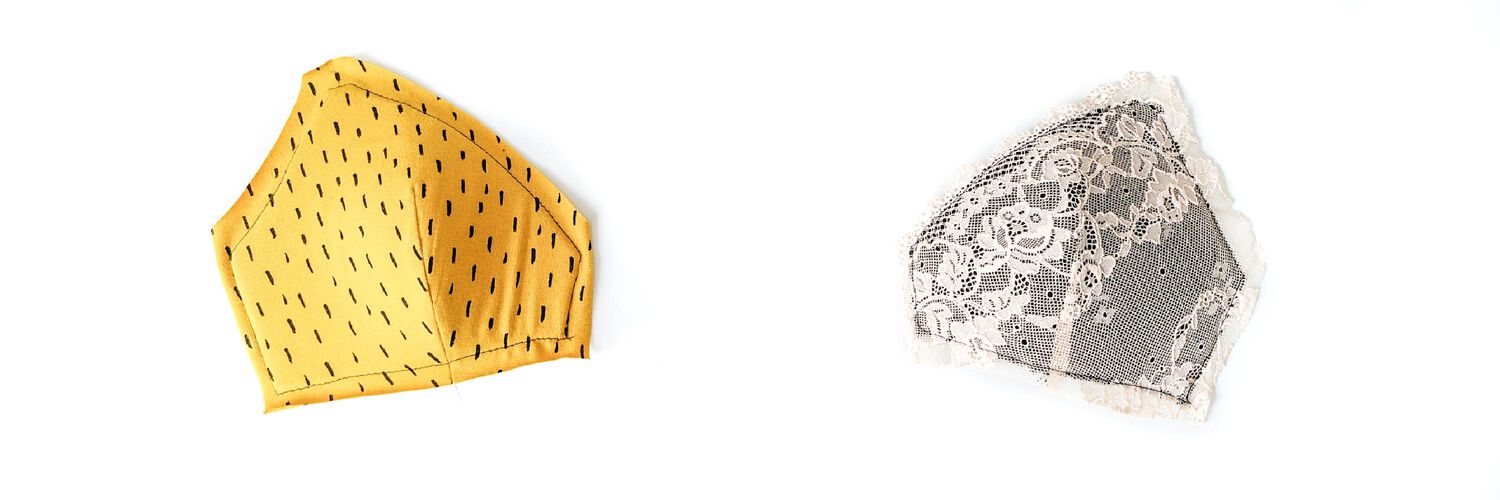
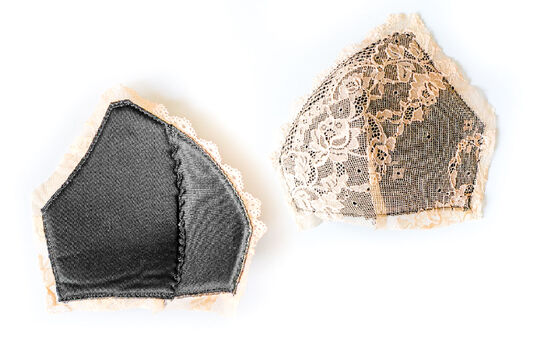
Overlay the foam cup with a stretch lace :
 |
And if you want to replace the fabric with a stretch lace, make a finish all around your foam cup, with a zigzag stitch or an overlock to "mash" the edge of the foam. NB: be careful not to pull the cap under the machine |
 |
All you have to do is position your foam inside the fabric, respecting the original seam values, and sew a basting stitch all around the cup to continue your sewing 🙂 |
We hope you enjoyed this tutorial and that it inspired you for future creations👙
Do not hesitate to take a look at our Sewing tips and our Blog articles if you want to learn new techniques
And of course, if you have any doubts, don't hesitate to contact us :


